The cabinet presented some challenges. The first was the veneer and substrate punched in on the left front corner. I found that I could push this out from the inside and make it mesh almost perfectly with the rest of the veneer. I squirted plenty of wood glue into the splintered layers from the inside and clamped a dowel inside the set pushing against the "wound" and let it set for a day. When this was dry I applied a little wood filler on the outside and sanded it when dry. In the "before" picture the cabinet was sitting upright; in the "after" picture it was standing on end. The pencil points to the repair, which is practically unnoticeable even before refinishing.

Now here's the cabinet stripped. There's a little veneer chip up top left that needs stain. I inserted a small piece of veneer as a repair and faked some shallow grain lines with a knife to blend in with the original top veneer, and used various stains and a fine brush to match the top coloring.

Next it was fine sanded, got a coat of sanding sealer, grain filler, more sanding, more sanding sealer, and some coats of lacquer all with fine sanding in between.
Here it is with the black bands painted top and bottom like the original and at an intermediate coat of lacquer. I use acrylic artist's paint for the banding. That's water based so I let it dry for a day before more lacquer. The lacquer over it makes it shine. There are two bands of semi-burl walnut around the radio that I sprayed with toner to make them stand out a bit more as photos of the original finish show. I was pretty happy with the cabinet at this point.

Here's a closeup of the decals before the black base was painted, more lacquer to come afterwards. Notice how the finger gouges around the dials are gone. The knob is just sitting there to help me judge decal alignment.

The brass escutcheon around the preset pushbuttons was discolored so I stripped and steel wooled it. I knew it was too shiny so looked for a way to darken it a bit. All of the methods I researched required chemicals I didn't have and didn't want to order for just one piece. Then I read that a hard-boiled egg would work. I put such an egg in a ziplock bag with the escutcheon, then smashed the egg and left it overnight. It did darken. I put in another egg for a second night and was happy with the results. The egg stays in its corner of the bag not touching the brass. It's the sulfurous atmosphere from the egg that does the work. The brass then got a coat of lacquer. The radio still had the old worn station call letter tags which were white on a reddish-brown background. I reproduced them for my new preset station choices on the computer and printed them on photo paper. I couldn't find the exact grille cloth but I have seen other original pictures of this radio with different cloths, so I bought one that I thought would be appropriate from Radio Daze and installed it. Mike Koste had sent me the exact knobs and I polished them by chucking a 1/4" shaft in the drill and spinning the knobs in a rag with auto body polishing compound. This removes grime and scratches and makes them look new.
After the lacquer cured for a couple of weeks I rubbed it out with rottenstone and mineral spirits.
The old vs. the new.

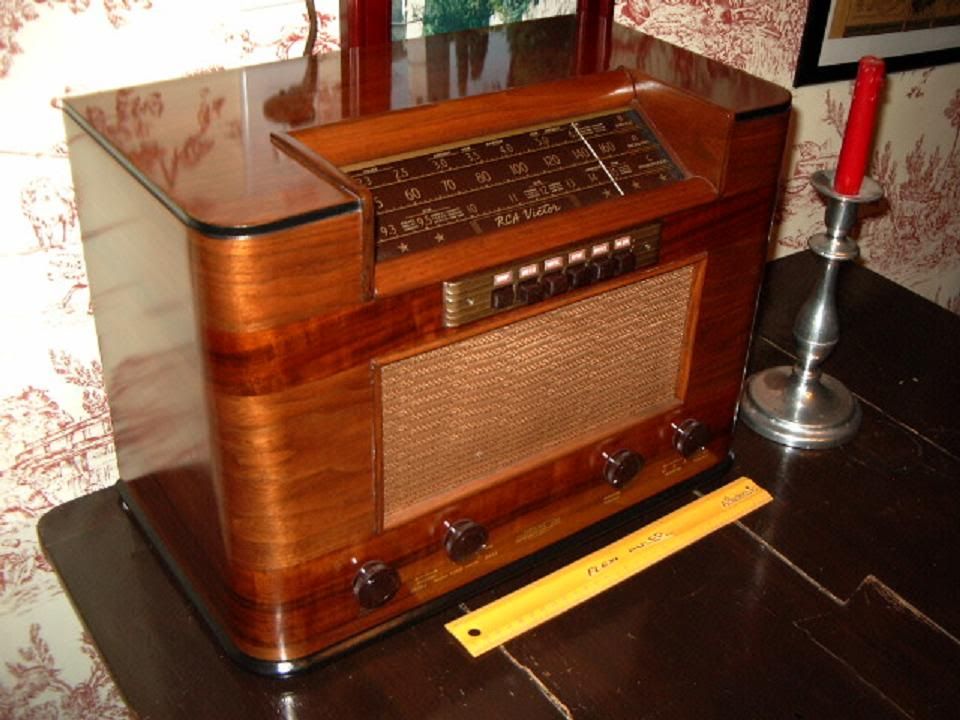
It's a real hunky radio, and a great performer. That's a 12 inch / 30 cm ruler.