
|
|
|
|
|
#1
 12-02-2010, 02:12 PM
|
||||
|
||||
|
I finally straightened that antenna out! I worked from the outside in, gluing it down a loop at a time. I used 5-minute epoxy at first, but that was taking forever so I switched to hot glue.
So does it work ? Yes! I am able to pull in stations from all over. Next, I plan to tweak the trimmers and coils using the RCA WR-50B RF generator I just picked up. All together it took about 4 hours  Definitely not something I ever want to do again!    

|
|
#2
12-02-2010, 02:46 PM
|
||||
|
||||
|
Good show! Like a heart or brain surgeon, one can't have coffee for 2 days before attempting a job like this...nerves of steel...
__________________
Reece Perfection is hard to reach with a screwdriver.
|
|
#3
12-03-2010, 10:37 PM
|
||||
|
||||
|
Thanks. Definitely no coffee before working on this!
The correct electrolytics showed up and I restuffed the can.  I also replaced the nasty old AC plug. The cord is a bit stiff, but seem sound enough.  So that's it for the electrical restoration. That leaves the dial pointer and the cabinet. kbmuri is working on reproducing the dial hub and the cabinet will have to wait until spring. 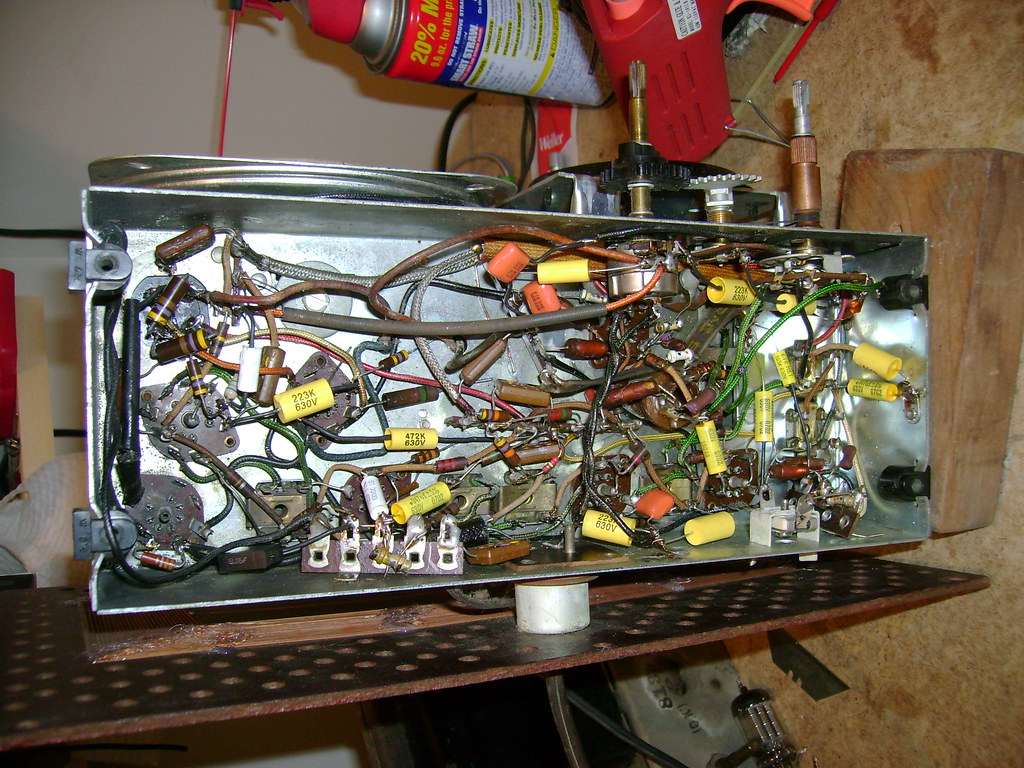
|
|
#4
12-03-2010, 11:32 PM
|
||||
|
||||
|
Quote:
__________________
Growing up leads to growing old and then to dying, And dying to me dont sound like all that much fun... -John Mellencamp
|
|
#5
12-04-2010, 12:11 AM
|
||||
|
||||
|
Patience, good tools and some great advice from drh4683 and Zenithfan1
Essentially, I used a small pocket knife blade to pry the seam open. Then, I switched to a small flat bladed screwdriver and worked my way around. Getting it started is the hardest part.
|
| Audiokarma |
|
#6
12-05-2010, 09:39 AM
|
||||
|
||||
|
It's looking great. I also see that you use the same mouse that I do. I like not having to move the mouse itself to do things.
This little radio will look nice in your collection. Bruce
|
|
#7
12-26-2010, 07:50 PM
|
||||
|
||||
|
Quote:
 I found some time to do an FM alignment and work on the cabinet this weekend. One of the three sections of the tuning knob was broken off when I received the radio. It looked like someone had tried to glue or melt it back together but failed. I went hunting for some glue and found this 2-part epoxy formulated for plastics. It smells, looks and feels different than epoxies I've used before. I figure that's a good sign because those others didn't work so well on plastic. I roughed up the surfaces, mixed the glue and applied a small amount the both surfaces. Although it takes 20 minutes to cure, I only had to hold it together for about a minute for it to hold in place. I let it sit for a couple hours just and it's good as new  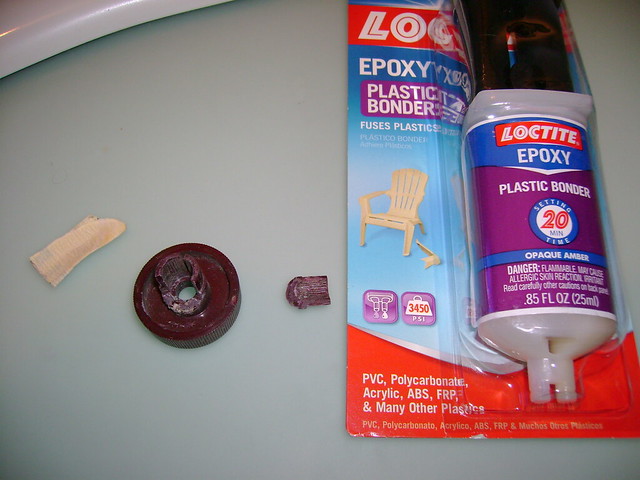 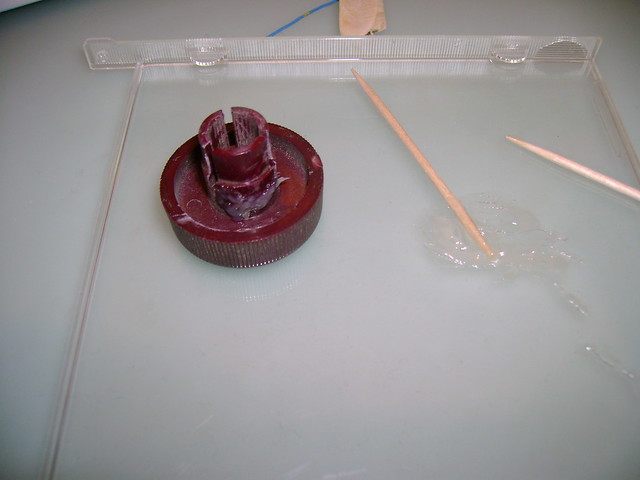 Now for a dunk overnight in some cleaner. All the old dirt and gunk fell right off. 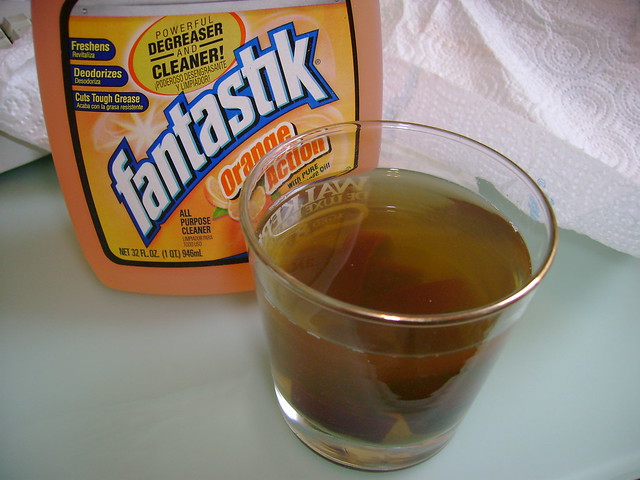  The plastic cabinet trim was held on with some metal clips. I was able to remove three of them without trouble, but the fourth post broke off. Good thing I have that glue! 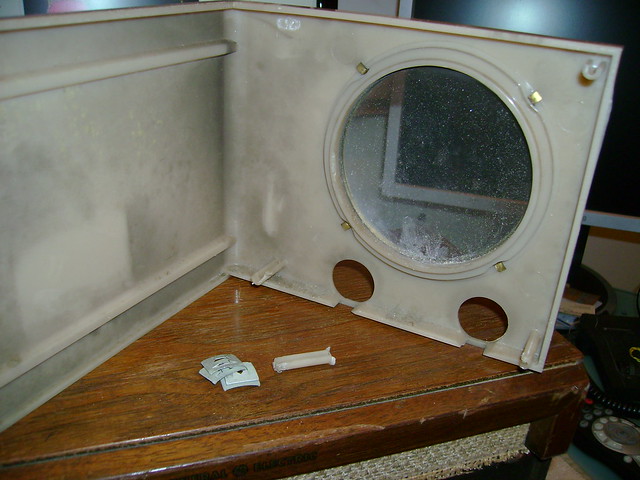 I carefully bent back the tabs on the brass bezel and removed it along with the dial glass. The logo was held on with another metal clip and I got it off undamaged. Time for some cleaning. 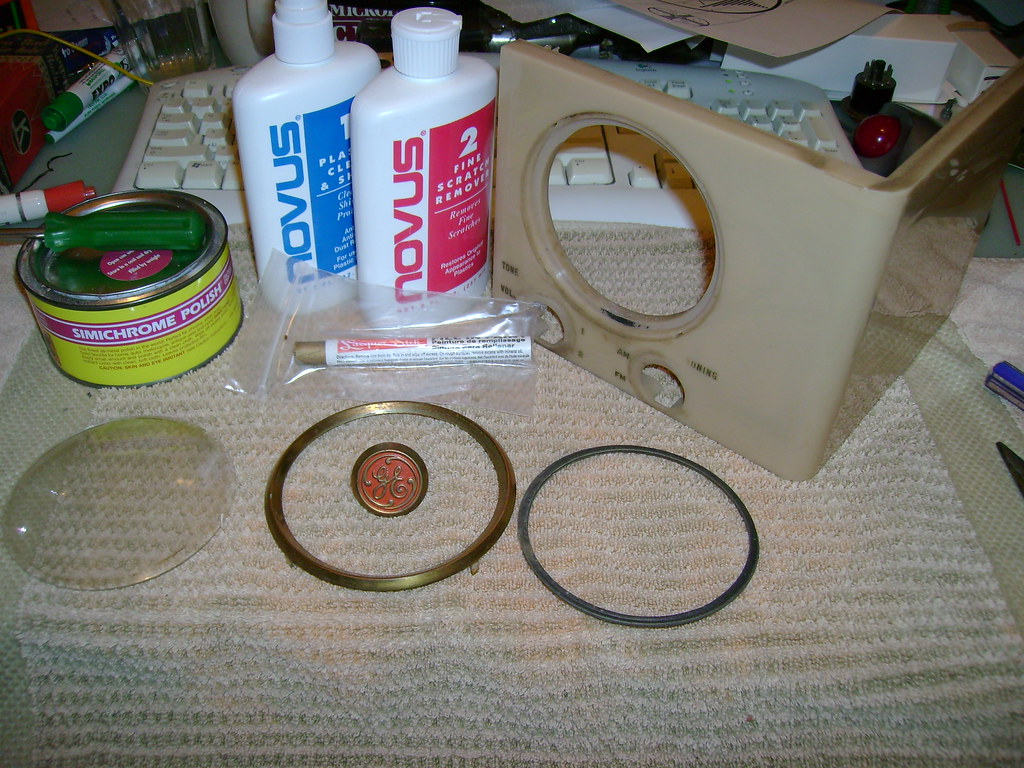 The brass polished up real nice. I sprayed it with the brass lacquer and will let it cure for a couple days. 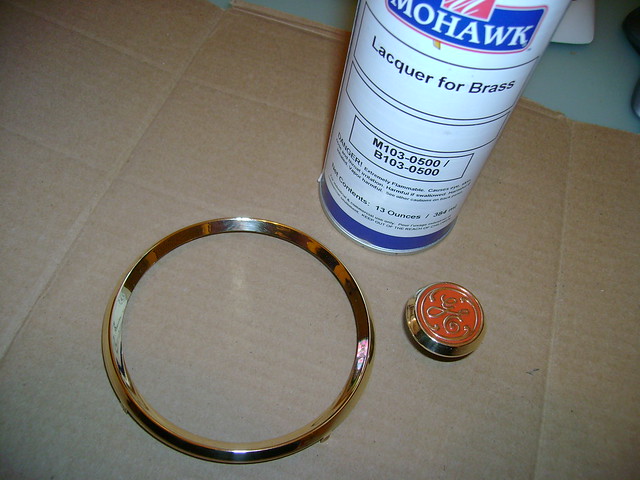 That leaves the plastic trim piece. I've buffed it with Novus and will attempt to fill in the recessed lettering with a lacquer stick or some paint. Last edited by bandersen; 12-26-2010 at 07:56 PM.
|
|
#8
12-28-2010, 10:15 PM
|
||||
|
||||
|
Time to deal with the disintegrated dial pointer. I flattened the red pointer with some heat and pressure. I couldn't salvage anything from the white plastic hub though.
So I dug through all my knobs and came up with this guy. 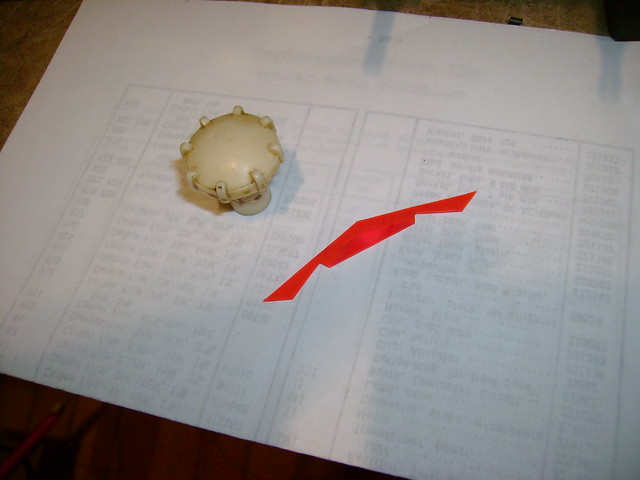 I cut down the shaft, drilled it larger and cut a slot. 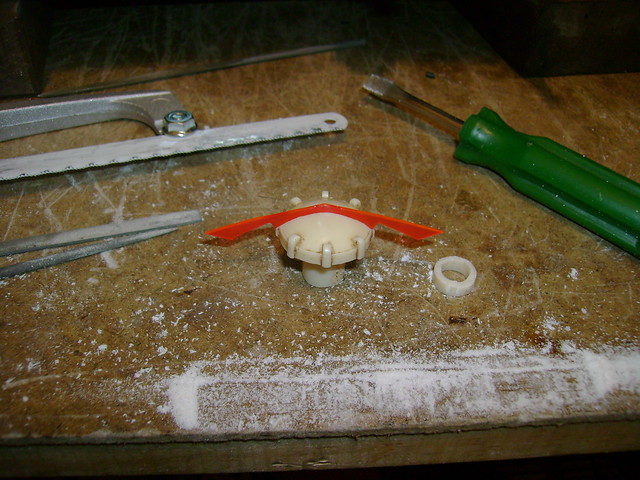 Then, I filed off all those nubs, sanded it smooth and polished it up. 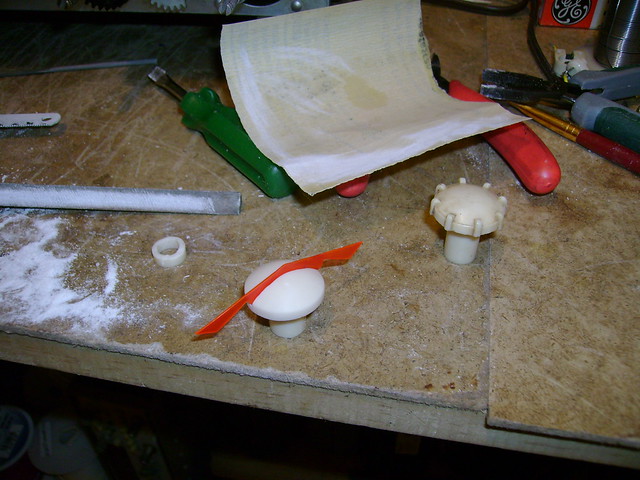 Here's a test fit. Not to shabby I think. The tuning shaft itself is off center. I think there are some adjustments screws for that. 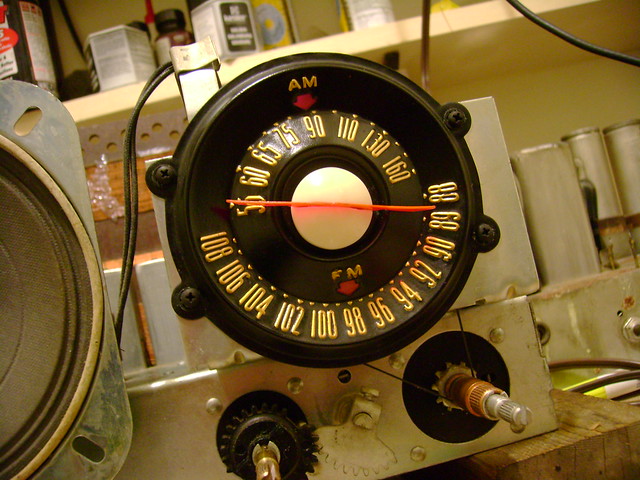
|
|
#9
12-29-2010, 01:24 AM
|
||||
|
||||
|
The cabinet face was held on by wood screws just like it's GE810 cousin. That made it a lot easier to avoid damaging the grille cloth.
I went over the cabinet with Howard's Restore-a-Finish Walnut followed by Feed-n-Wax. There are areas of finish loss so it could benefit from a refinishing, but that can wait until summer. 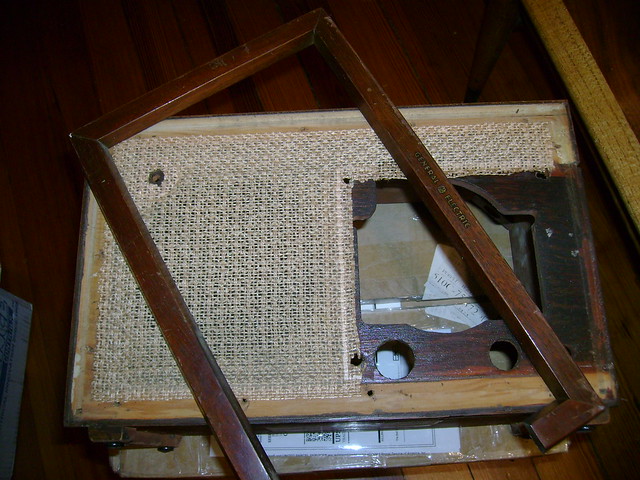 Here's a before and after. I tried using gold to fill in the recessed lettering, but it was hard to see so I went with black. 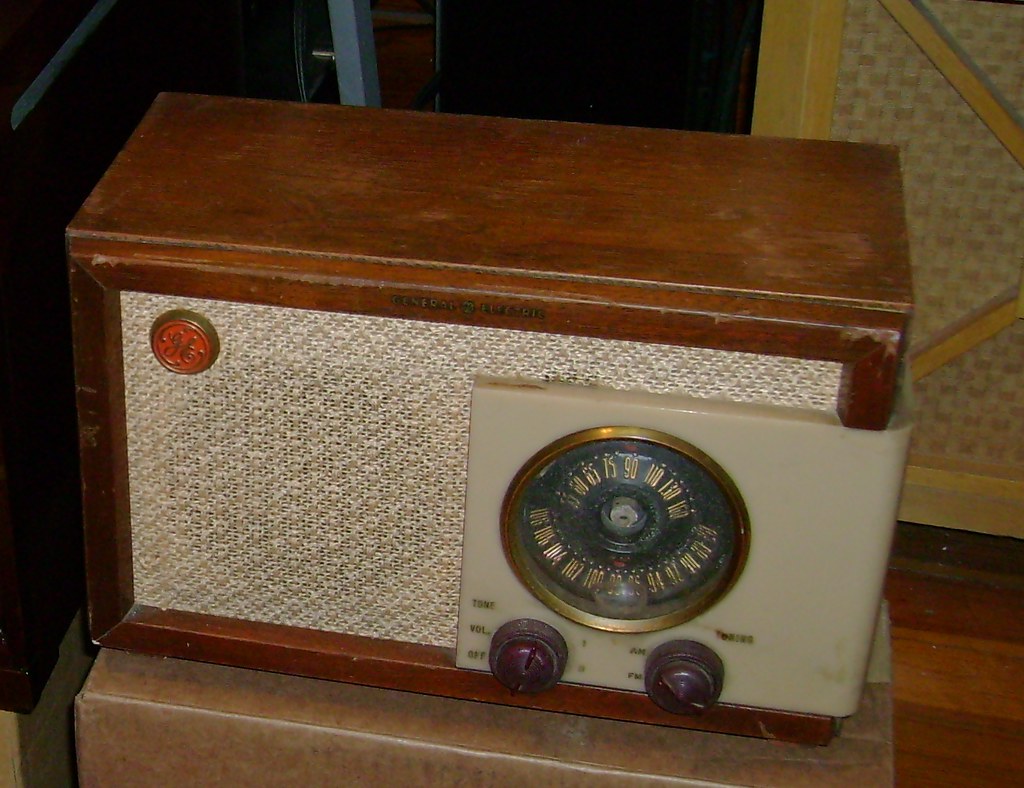 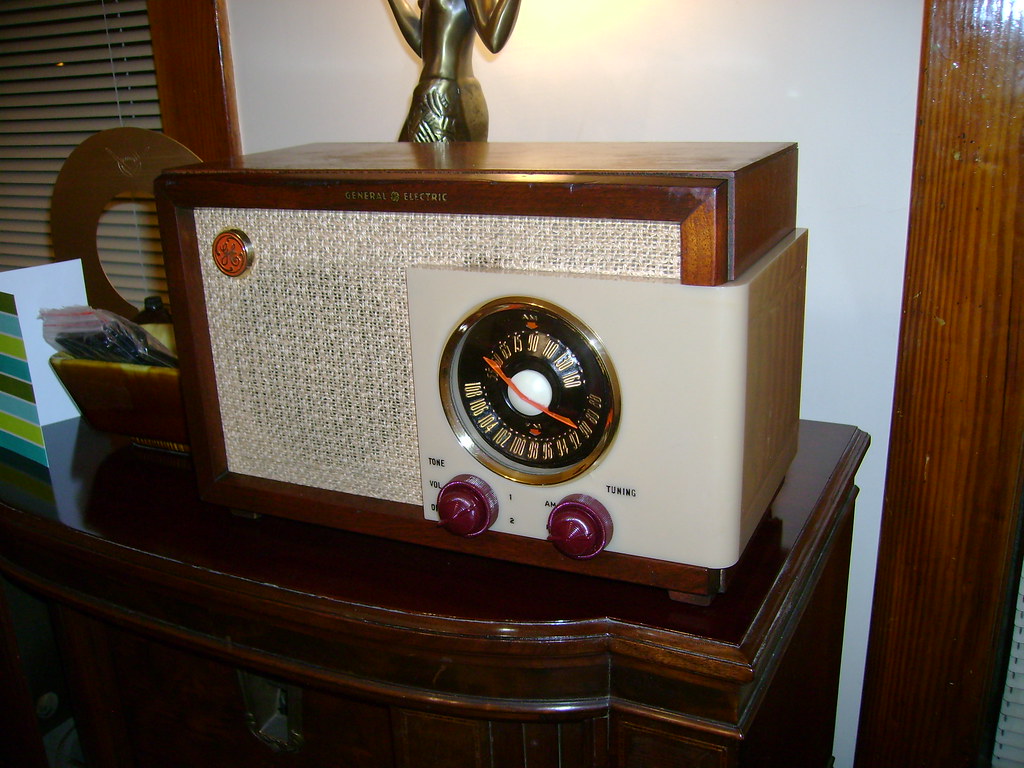 Here it is on top of my GE 810. Yes, I'll replace that burlap grille cloth on the 810 someday .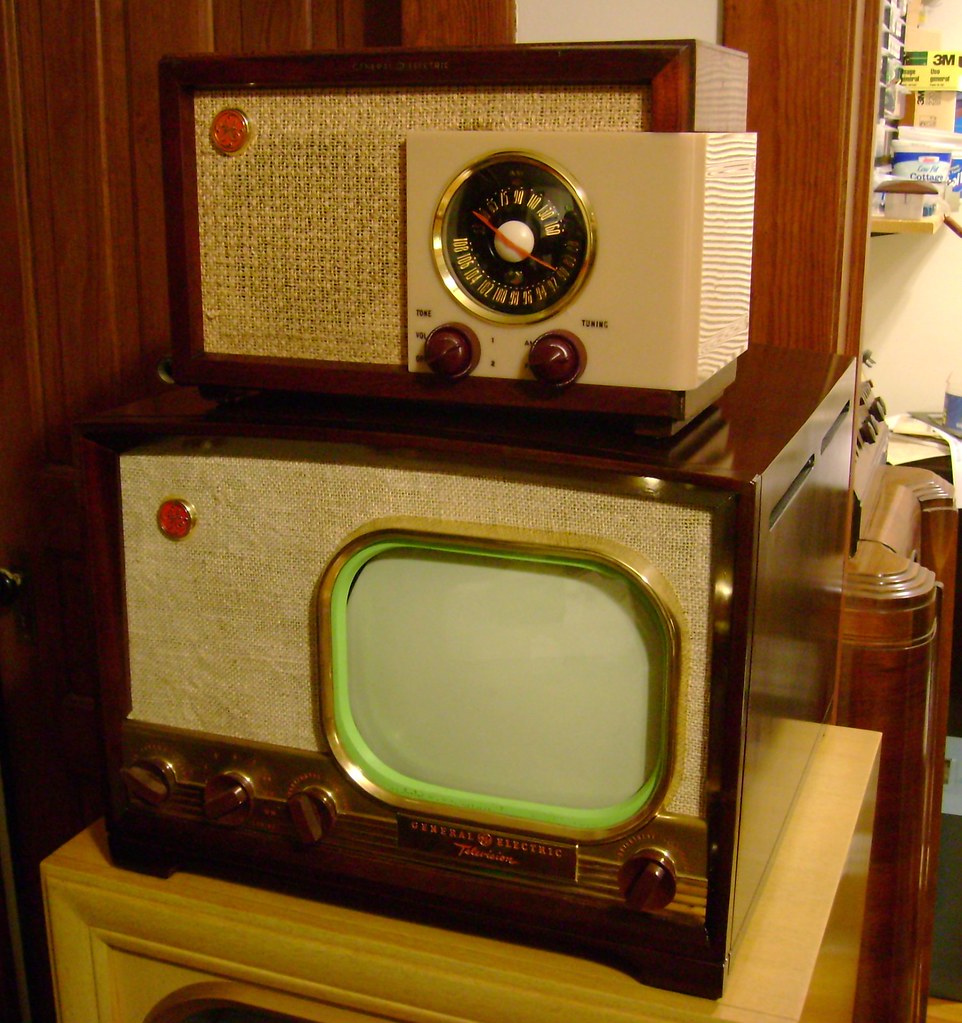
Last edited by bandersen; 12-29-2010 at 01:30 AM.
|
|
#10
12-29-2010, 06:23 PM
|
||||
|
||||
|
Beautiful. Its just beautiful!
|
| Audiokarma |
|
#12
12-29-2010, 07:18 PM
|
||||
|
||||
|
Thanks guys. I dug up a picture of a set with an intact dial pointer.
I guess my replica isn't too shabby after all. 
|
|
#13
12-29-2010, 11:08 PM
|
||||
|
||||
|
Always a pleasure to see your work. I hope fare half as well on some of my own projects waiting their turn.
|
 |
| Thread Tools | |
| Display Modes | |
|
|


 Hybrid Mode
